
Please read my disclosure policy to understand how I work with companies and individuals. Linking to a specific site does not imply endorsement of all of their services or content
Table of Contents
- Signs a Hardwood Floor Needs Attention
- Refinish, Recoat, or Replace?
- What to Check Before Work Begins
- How to Prepare the Room
- The Refinishing Process
- Comparing Floor Finishes
- Ventilation and Indoor Air Quality
- Daily and Seasonal Floor Care
Hardwood floors can last for decades, but daily foot traffic, pets, spills, sunlight, and seasonal humidity changes eventually leave visible wear. Before assuming replacement is necessary, homeowners should understand whether a floor needs cleaning and maintenance, a protective recoat, or complete sanding and refinishing. For local project guidance, SOEN Hardwood Floor Refinising can help homeowners evaluate the condition of an existing wood floor.
The best choice depends on the extent of the damage, the type of flooring, any prior repairs, and whether moisture has affected the boards. A careful inspection and a realistic plan for preparation, drying, curing, and long-term care can protect both the floor and the household routine.
Signs a Hardwood Floor Needs Attention
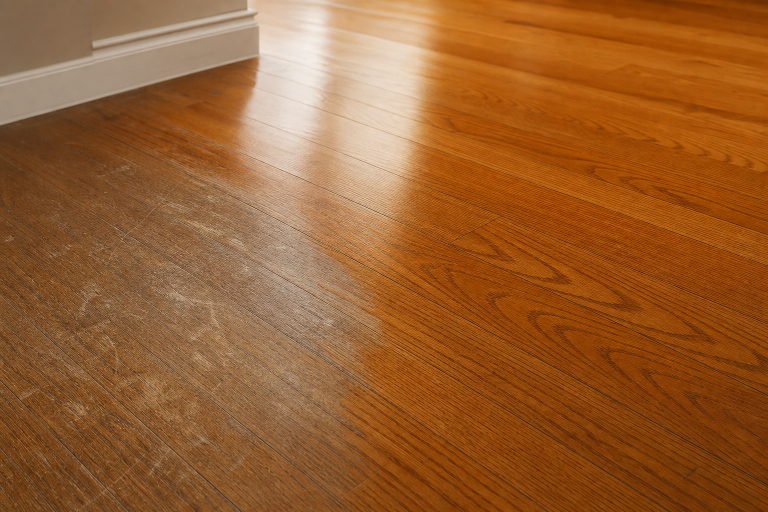
Light scratches, dull traffic lanes, faded color, small dents, and a finish that looks cloudy or uneven are common signs of surface wear. A floor may also need attention when bare-looking areas appear near doorways, in halls, in kitchens, or at pet feeding stations. Appearance matters, but it is not the only concern. Dark stains, cupping, soft boards, wide gaps, or movement underfoot can point to moisture or structural issues that should be addressed before cosmetic work begins.
Refinish, Recoat, or Replace?
When a Recoat May Be Enough
A recoat can be a good fit when the existing finish is still intact but lightly scratched or dull. The surface is cleaned and prepared so a new protective coat can improve sheen and wear resistance. It is usually the least disruptive option, but it may not work on floors contaminated by wax, certain cleaners, or incompatible coatings.
When Full Refinishing Makes Sense
Full refinishing is more appropriate for deep scratches, widespread wear, fading, old stain color, or areas where the protective layer has worn through. Sanding removes the old surface so repairs, stain changes, and new finish coats can be applied. It creates more disruption than recoating, but it can dramatically improve a solid wood floor that remains structurally sound.
When Replacement Is the Better Choice
Replacement may be necessary for severe water damage, rot, repeated warping, extensive repairs, or boards that no longer have enough usable material for sanding. Engineered flooring requires special attention because its top wear layer can be too thin for aggressive refinishing. When in doubt, have the floor type and remaining wear layer assessed before approving work.
What to Check Before Work Begins
Inspect the floor closely before choosing products or scheduling a project. Look for loose boards, exposed nail heads, squeaks, cracked planks, old patches, pet stains, and moisture near sinks, exterior doors, and windows. Ask whether the floor has been sanded before, especially in an older home. Test stain samples on an inconspicuous area or spare board, since wood species, grain direction, previous color, and lighting can all change the final appearance.
How to Prepare the Room
- Remove furniture, rugs, plants, curtains near the floor, and fragile décor.
- Plan storage for furniture and clear a safe path for workers and equipment.
- Secure loose trim, identify damaged boards, and discuss whether the doors need to be removed.
- Keep pets, children, and people with respiratory sensitivities away from active work areas.
- Coordinate painting, cabinet work, or other dusty projects to prevent damage to the new finish.
The Main Steps in Hardwood Refinishing
Professional refinishing generally begins with an inspection and repair plan. Loose boards and fasteners are addressed first, followed by staged sanding to remove old finish and smooth the surface. Edge work and transitions receive separate attention. Fine dust is then removed before stain samples, if desired, and finish coats are applied. The final stage is curing, which is different from simply feeling dry to the touch. Product instructions and site conditions determine when the room can safely return to normal use.
How to Compare Floor Finishes
- Water-based finishes: Often dry faster, have a lower odor profile, and keep wood closer to its natural color.
- Oil-based finishes: Often add a warmer, amber tone and may require more drying time between coats.
- Hardwax finishes: Can create a natural, low-build appearance and may allow smaller spot repairs.
- Penetrating oils: Soak into the wood and can offer a soft look, but usually require regular maintenance coats.
Choose color and sheen only after viewing samples in daylight, evening light, and the lighting used most often in the room. A beautiful sample under showroom lights can look very different at home.
Ventilation, Odor, and Indoor Air Quality
Ventilation should be planned before sanding, staining, or coating begins. Ask which products will be used, whether windows should remain open, and when occupants can re-enter the area. Odor alone is not a reliable measure of safety, so follow the product label and the contractor’s re-entry guidance. The EPA’s guidance on volatile organic compounds and indoor air quality also emphasizes fresh air and following label precautions when using products that emit VOCs.
Timeline, Access, and Curing
Ask for a written schedule that distinguishes sanding days, coating days, light foot traffic, furniture return, rug placement, and full cure time. Socks-only access may be allowed before the finish is ready for heavy furniture, pets, or area rugs. Moving furniture back too early can scratch, dent, or trap moisture against a finish that has not fully cured. Leave extra time for repairs, weather changes, and stain approval.
Daily and Seasonal Floor Care
Protect a finished floor with clean entry mats, felt pads under furniture, trimmed pet nails, and regular removal of grit using a soft broom or a vacuum setting designed for hard floors. Wipe spills promptly, but avoid soaking the surface. Steam cleaners, harsh chemicals, abrasive scrubbers, and wax products can damage or cloud many modern finishes. For general background on floor materials and finishing methods, review wood flooring.
Common Mistakes to Avoid
- Selecting a stain from an online image instead of an in-home sample.
- Skipping moisture checks and repairs before sanding.
- Assuming every product has the same drying and curing schedule.
- Using excess water or unapproved cleaners after refinishing.
- Returning heavy furniture and rugs before the finish is ready.
Questions to Ask Before Hiring Help
Ask what type of wood and existing finish the floor has, whether recoating is possible, how dust will be controlled, what products will be applied, and which finish best fits the household. Confirm preparation responsibilities, expected project duration, re-entry timing for people and pets, and safe cleaning products after completion. Request written details about repairs, stain selection, finish coats, and any conditions that could change the schedule.
A Simple 2026 Floor Care Checklist
- Inspect high-traffic areas every season.
- Keep mats dry and furniture pads clean.
- Clean spills before they spread into seams.
- Watch for new stains, gaps, movement, or finish wear.
- Save product labels and care instructions for future reference.
Conclusion
A successful hardwood floor project starts with an honest assessment. Minor wear may need only a recoat, while more serious damage may call for refinishing, repair, or replacement. By preparing the room carefully, selecting a finish that suits daily life, allowing proper curing time, and maintaining the surface consistently, homeowners can help wood floors remain attractive and functional for years.

